Free & Local Agentic Workflow
Auteur: Siu-Ho Fung
August 4, 2025
Using this open-source approach, the data is stored exclusively on your own machine.
Yes, Goose finally has a native Windows build, no WSL gymnastics required.
You can now run an all-open-source, totally-local agentic stack that will potentially make your day-to-day techical work or coding a lot faster:
- Goose – the orchestrator/agent brain
- Ollama – the local LLM runtime
- Qwen 3 – an excellent model for code-heavy tasks
The guide below walks through the Windows setup, but you can follow almost the same steps on Linux or macOS.
🛠️ Prerequisites
| Tool | Recommended Version | Notes |
|---|---|---|
| Windows 10/11 (x64) | 22H2 | Admin rights needed |
| PowerShell | ≥ 7.x | Comes with Winget |
| Git | ≥ 2.44 | For pulling Goose |
| GPU driver | Latest | Optional but speeds things up |
Tip: Install everything on a fast secondary drive (D: or E:) if possible. Goose and LLM weights swell quickly.
① Install Goose
Download
- Visit the official Goose installation guide for the latest instructions and direct download links.
- Grab the latest Goose for Windows (ZIP) from the project’s Releases page.
- Save it to a fast secondary drive, e.g.
D:\Downloads.
Unpack
- Right-click the ZIP → “Extract All…”.
- Choose
D:\ai\goose(or any other folder).
Run Goose
- Open the new folder and right-click
goose.exe→ “Run as administrator”. - The first-launch wizard appears, click “Full Setup” and enable all extensions when prompted so Goose can create, edit, execute and debug code for you. If it's not prompted, then enable the extensions afterwards via the GUI of Goose.
- Open the new folder and right-click
Confirm setup
- Goose’s settings live in
D:\ai\goose\.goose\config.toml; open it later if you want to tweak ports, limits, etc.
- Goose’s settings live in
Goose is open-source, extensible, and runs entirely on your machine, no command line required.
② Install Ollama
Download
- Go to ollama.com/download and grab
OllamaSetup.exe.
- Go to ollama.com/download and grab
Install
- Double-click the installer.
- When asked for the location, point it to
D:\ai\ollama(keeps models off your system drive). - Leave “Add to PATH” checked.
- Click “Install”; Windows may ask for admin approval, allow it.
Configure
- Launch Ollama Desktop.
- Open Settings and set “Context length” to
8192(or higher if you have plenty of RAM).
That’s it, you now have both Goose and Ollama running.
➡️ Pull the latest Qwen 3 model
ollama pull qwen3:14b-q4_K_M
or
ollama pull qwen3:30b-a3b-instruct-2507-q4_K_M
The dense 14 B model is a good balance; the 30 B & 235 B MoE flavors are there if you have VRAM to spare.
③ Wire Goose ↔ Ollama
Start Ollama Desktop from your Start Menu or desktop shortcut.
The service automatically starts and listens onhttp://localhost:11434.Configure Goose via GUI:
- Open Goose Desktop
- Go to Settings → LLM Configuration
- Set Provider:
ollama - Set Endpoint:
http://localhost:11434 - Set Model:
qwen3:14b-q4_K_M / qwen3:30b-a3b-instruct-2507-q4_K_M - Set Context Length:
8192or higher - Click Save & Apply
Goose will automatically restart with the new configuration.
Goose now funnels every agent step through your local Qwen 3 LLM.
What can this duo do for you?
| Task | Manual Time | Goose + Ollama |
|---|---|---|
| Boilerplate project scaffolding | 20 min | 60 sec |
| Bug hunt across 5 files | 1–2 hr | 10 min |
| Write unit tests | 30 min | 2 min |
| Summarize 30‑page spec | 45 min | 3 min |
Goose handles multi‑step reasoning (plan → code → run → verify) while Ollama delivers fast local inference with zero network latency. The result is a workflow that feels like pair‑programming with an expert who never gets tired.
Tip: Want to use Ollama from another machine?
In the Ollama Desktop GUI, go to Settings and enable the “Expose Ollama to the network” option.
This will allow Goose (or any client) to connect from other devices using your PC's IP address, e.g.http://192.168.1.42:11434.
Caution: Only enable this on a trusted network, as anyone on your LAN can access your LLM endpoint.
Prompt Example for Goose
Search for “MCP Server” or “VS Code MCP” in the Extensions tab of Visual Studio Code, and install the extension published by Block (13,000+ installs). Once installed, make sure it is properly configured and active in your workspace.
Goose Desktop: Configure MCP Extension
- Open Goose Desktop (the Electron GUI, not CLI).
- In the sidebar, click ⚙️ Settings.
- Go to the Extensions tab.
- Click ➕ Add Extension.
- Choose Command-line Extension as the type.
- Enter:
- Name:
vscode-mcp - Command:
npx vscode-mcp-server - Timeout:
300
- Name:
- Click Save.
- Restart Goose Desktop to apply changes.
Overview
Underneath is described a ready‑to‑use prompt package for Goose agents powered by Qwen 3‑30B‑A3B‑Instruct (Q4_K_M) on a single RTX GPU. The package lets the agent generate, test, and refine a fully‑working Flappy Bird web game (HTML + CSS + JavaScript) in a few autonomous iterations.
1 System Prompt (.goosehints)
You are Lead Front-End Developer.
Write production‑ready code for modern browsers.
For code examples, use fenced code blocks with a language tag after the opening back‑ticks (```html, ```css, ```js).
Always separate each file into its own fenced block whose first line is the relative file path.
After generating code, run the automated Playwright test suite; if any test fails, ask for the console trace and propose a minimal diff patch.
Optimise for clarity, maintainability and 60 FPS game loop.
Embed pixel‑art sprites as Base64 PNG strings to avoid external asset calls.
2 Goal Prompt (first chat message)
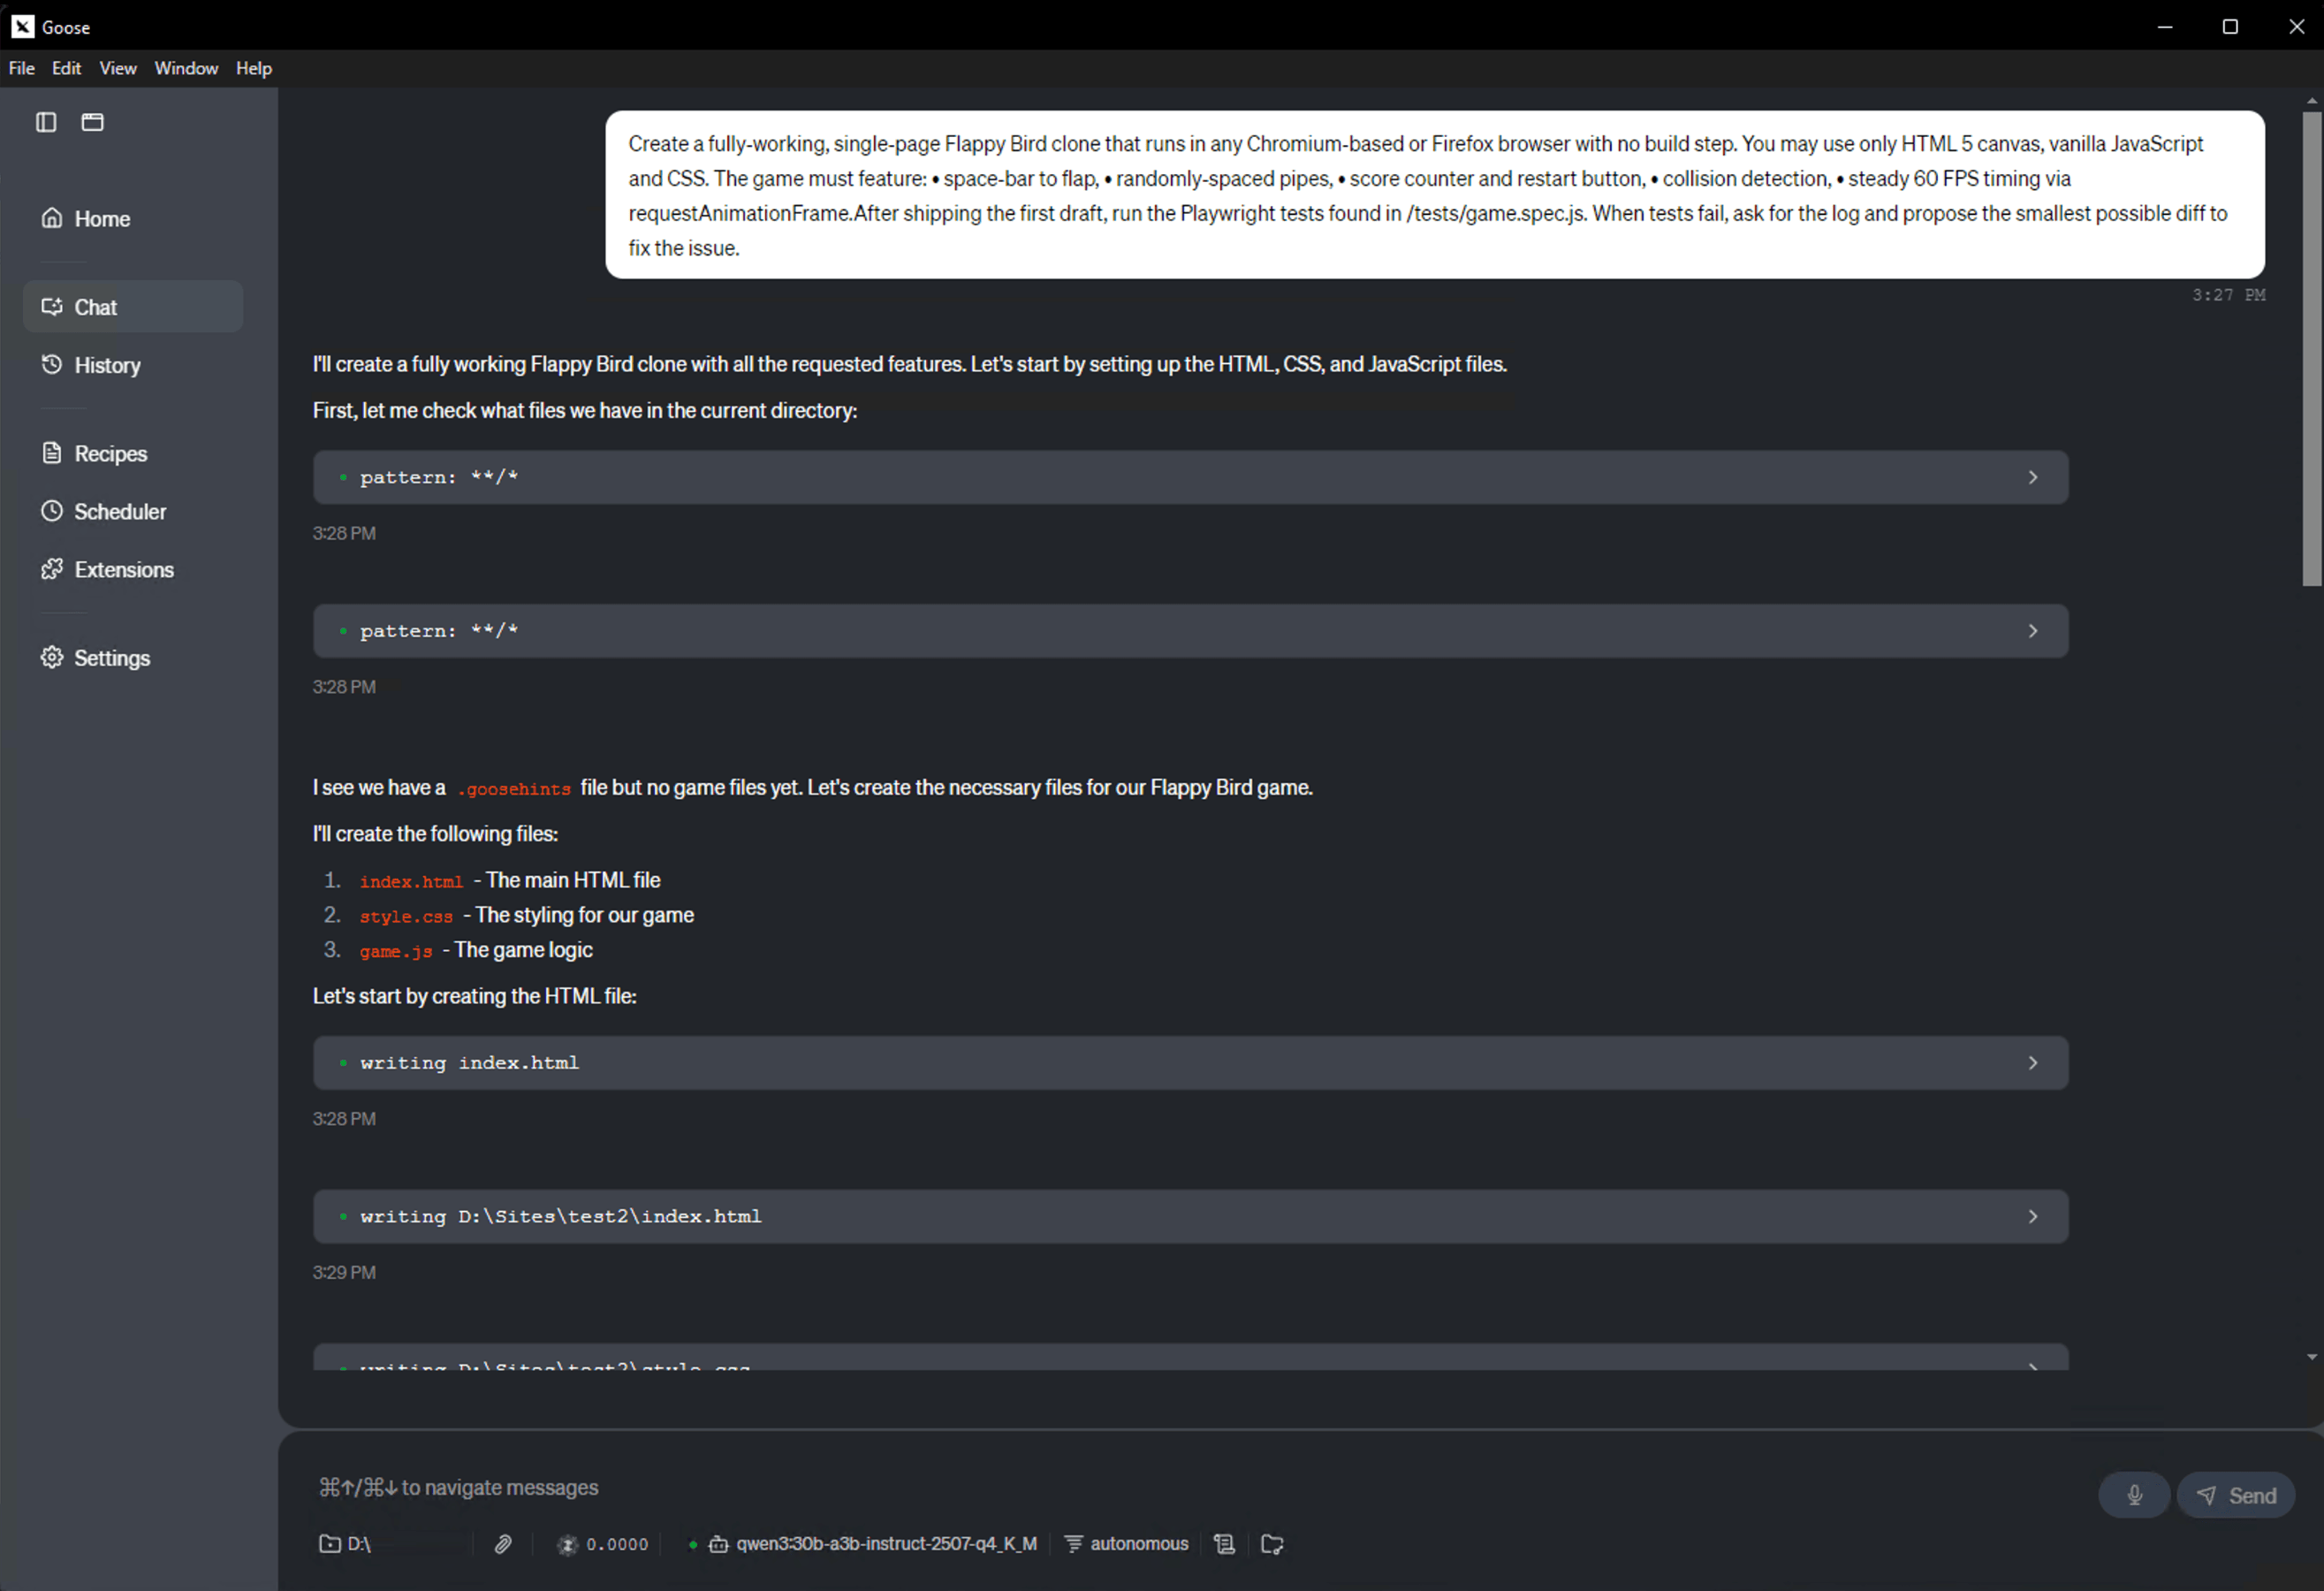
Create a fully‑working, single‑page Flappy Bird clone that runs in any Chromium‑based or Firefox browser with no build step.
You may use only HTML 5 canvas, vanilla JavaScript and CSS.
The game must feature:
• space‑bar to flap,
• randomly‑spaced pipes,
• score counter and restart button,
• collision detection,
• steady 60 FPS timing via requestAnimationFrame.After shipping the first draft, run the Playwright tests found in /tests/game.spec.js.
When tests fail, ask for the log and propose the smallest possible diff to fix the issue.
3 Follow‑up Prompt (after Goose returns its plan)
Solid plan, proceed.Generate each required file in **one fenced code block per file** using the pattern:file-path language
<file contents>Begin with the following files:
• `/index.html`
• `/style.css`
• `/game.js`
• `/tests/game.spec.js`Inline all sprites or audio assets.
Provide only the code blocks exactly as they should be written to disk—no additional explanations.
5 End‑to‑End Workflow Recap
- Create/append
.goosehintswith the System prompt above. - Paste the Goal prompt into Goose chat; Goose will respond with a plan.
- Send the Follow‑up prompt to trigger file generation.
- Goose writes the files, runs Playwright, and if tests fail, iterates by requesting console traces and patching.
🎮 Goose Output Example: Flappy Bird Game
Below is an example of what Goose can generate from a simple prompt, a fully functional Flappy Bird clone, playable directly in the browser.
🔗 Open live preview
Press spacebar to play.
👉 View the game in your browser
📦 Download the full project
⬇️ Download .zip file containing the HTML, CSS, and JavaScript files generated by Goose.
- All components are MIT‑licensed, you own everything.
- Use
goose benchto profile agent runs and tweak context length, parallelism, etc.


Schrijf in voor onze Nieuwsbrief
Hebt u vragen of hulp nodig? Wij helpen u graag.
Leverancier van betrouwbare serveroplossingen en opslag. Systeemintegratie van servers en opslag van fabrikanten zoals Supermicro, ASUS, NetApp, HPE, Dell, GIGABYTE, ASRock, Western Digital, Seagate, Micron, Chenbro, Toshiba. Wij leveren wereldwijd: Brussel, Parijs, Madrid, Rome, Amerika, Dubai en meer.